Posts mit dem Label tutorial werden angezeigt. Alle Posts anzeigen

Dienstag, 14. Juli 2015

Flower Power Blanket - Free Pattern

 I always adored this crochet blanket
made by my mother Ottilie around 30 years ago...


A lot of people admired it as well
when I've posted a pic on my Facebook page.
I could only lead interested crocheters
 republished by the popular magazine "Brigitte"...
I thought I could just ask for the permission
to make an English translation
for my crocheting friends
who have less german skills than me...
And yes!!!
The magazine "Brigitte" was so lovely
& gave me their friendly permission! :-)

I have to add a photo & a little story:
A few hours after I've published this blogpost
Ute Rehner - a friend of my page -
commented on facebook.

She was sitting in a train
while she has seen my post
& she knew straight away in which year
this pattern was originally published:
1974

This flower blanket
is actually on her to-crochet-list
since 41 years,
she was so lovely to send me a photo
of her precious original pattern:


Thank you so much, Ute!
And of course I will send your regards
to the editorial department of "Brigitte" on this way!
♥♥♥

You need for a blanket measuring 160 x 190 cm:

1500 g of colourful yarn rests
250 g yarn in olive green for the border
(or different colours as my mother did)
a 2,5 mm hook
(of course you can also use a bigger hook size
for a blanket with less but bigger flowers
- I guess my mom has used a 3,5 or a 4mm hook)

You work the first rosette this way:

Start with 6 ch, form a ring with a slip stitch


1. round: 
work 12 single stitches in the ring
(crochet away the yarn end from the beginning)
end with a slip stitch


2. round: 
chain 3 (counts as first dc)
dc in the same stitch
2 dc in every stitch around
close row with a slip stitch in 3rd chain from beginning
(you should have 24 dc now!)


3. round:
Change your colour!
Now we will work
TWO stitches of the following stitch combination
in every SECOND stitch:
*3 treble, 1 dc, 1 single stitch, 1 dc*
(repeat 5 times
& close this round with a slip stitch
in 4th chain of beginning)

[note: The first treble = 4 ch;
It may be confusing to work
2 stitches in every second stitch
- basically you work:
*1 treble / 2 treble in the next stitch /
1 dc / a single stitch & a dc in the next stitch* x5]


What a pretty flower!
But how to attach the next flower?

Work the second flower
until the last round
as the first one...


Then we work the first 3 trebles of round 3
& work a slip stitch between
the 3rd treble & dc
as shown in the picture


Now work 1dc / a stitch & a dc
in your second flower
...and again:
a slip stitch between dc & treble
of your first flower
- then go on with the 3rd round as usual!


The 3rd flower will be attached this way
on the first flowers - two times...
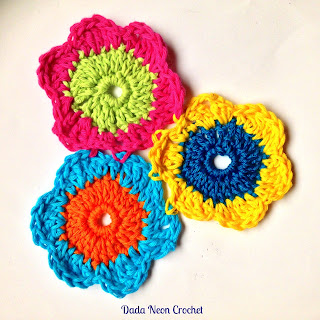

...and so on...


...when you have 29 rows
containing 27 flowers each you are almost done!

This is how you work for the border
in the original pattern:
(In the german pattern is only a rough description)

1. One row with single stitches all around.
(In the pattern with olive green
- my mom made a multicoloured border
but just use your own style!)

2. This is challenging!
Work dcs & trebles in the triangles
of your border to fill the gaps!
The pattern recommends
to regulary skip some stitches
otherwise it will get wavy!
- Trust your feeling & your skills!

[My mother Otti did the border another way:
She just added colourful rows
of single stitches
which gives a nice wavy border]


3. As many rows of dc stitches
as you like!

Yay! Congrats!!!
You have a wonderful Flower Power Blanket now!


My friend MariaElena has already started
her own Flower Power Blanket
(or Otti-Blanket as we use to call it!)
& has shared progress pictures with me:


So clever to create all the circles
in the beginning! ;-)

And another friend of my page has already started
a Flower Power Blanket!
Here you can see a progress photo
of Lee Schlomm's growing prettiness! :-)


I have only translated the pattern
but I love it badly
so PLEASE show me pictures
on my Facebook page!
(...and if you have questions
be free to contact me there as well!)

And of course a huge THANK YOU
to the german magazine "Brigitte"
for the permission
to translate it!

Hugs & love:
Dada

Sonntag, 21. Juni 2015

Granny Square Bowl

Last year a pretty awesome tutorial went viral -
of course I've added it to my virtual to-crochet-list
- my Dada Neon Crochet timeline on Facebook!

I absolutely fell in love with this stunning
With her kind permission I can show you a photo of her work here: 

by Marrose - Colourful Crochet & Crafts (http://marrose-ccc.com/tutorials-2/yarn-ends-bowl/)

As you know I'm always working on too many projects
& so it took quite a while
until this wonderful piece of scrap yarn art
came into my mind again!

While making the paste for the project
(Just with water, flour & sugar!)
I was thinking:
Why not trying it with granny squares...
That's the result & I'm pretty pleased!


Sooo...and this is what I did:

First of all:
Making the paste!
Marianne of Marrose - Colorful Crochet & Crafts
has used this recipe of Carolyn's Homework (Click!)
& so I followed the instructions...


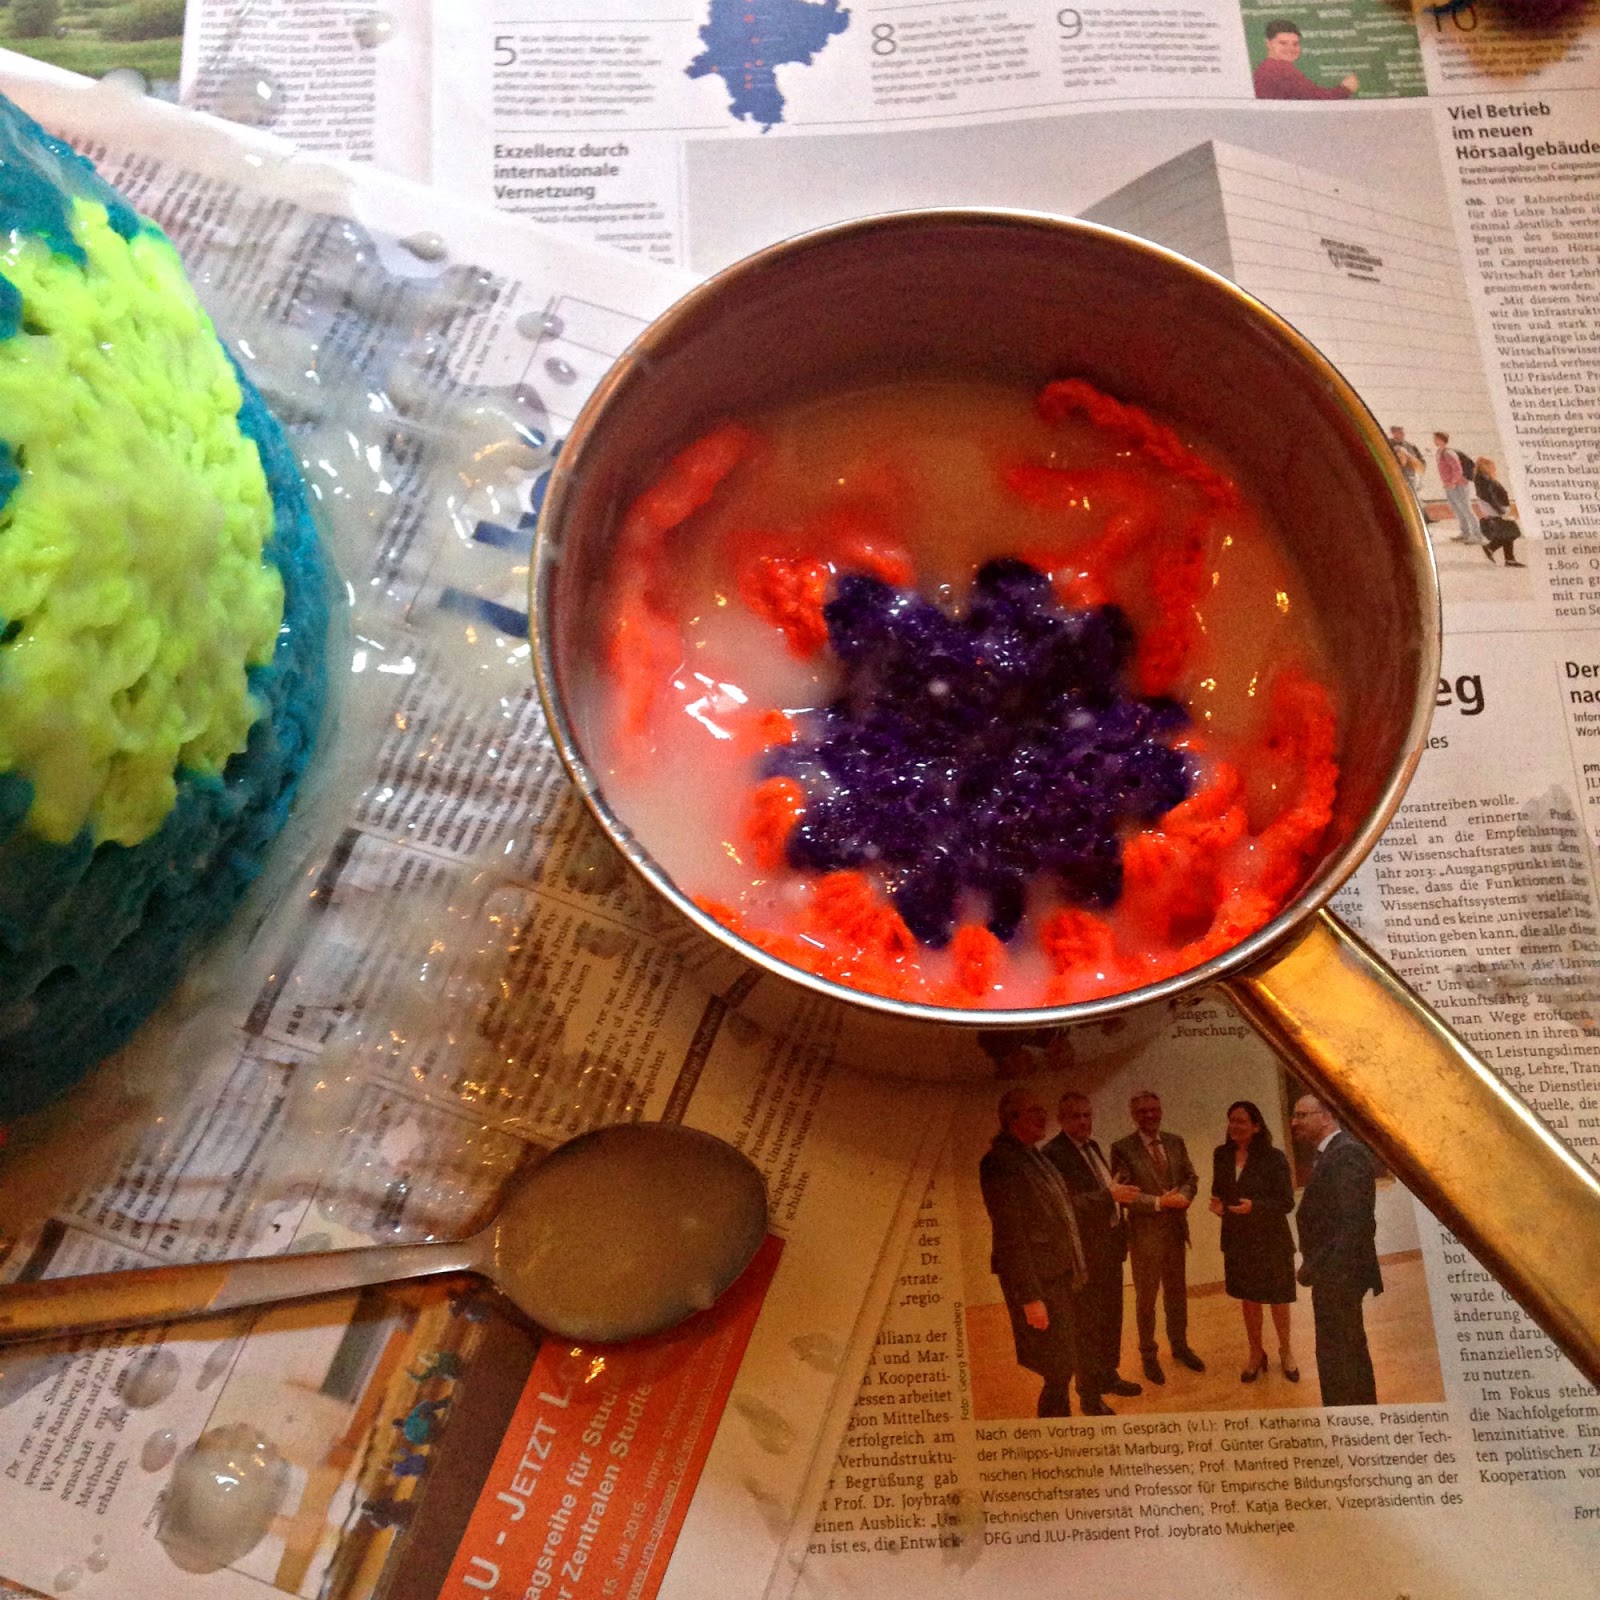
Then I've covered a salad bowl with plastic wrap...


I've soaked the pieces with the paste
& and then I covered the bowl with Granny Squares...
(The 3 Squares are made with the pattern
Circle In a Square Granny by Zooty Owl
the middle square was a leftover of a project,
I can't remember the pattern name
but every circle pattern should perfectly work)


Sooo much paste left!
So I soaked another single Granny Square with the paste...


...and arranged it on another
plastic wrapped bowl...


It took 4-5 days to dry
so you have to be patient!
(We didn't have much sunshine,
if you have some sunny days
let them dry in the sun!)

...so pretty!!!


...also nice as a helmet, haha!


If you make YOUR version
please post it to Dada Neon Crochet!
And if you are inspired to make
Marianne's awesome Yarn Ends Bowl
show her your work on Marrose - Colorful Crochet & Crafts!
I will definitely need one, too! ;-)

Stay awesome! (And creative!)

Dada

Mittwoch, 8. April 2015

Granny Square Mosaic Photo Tutorial - With Mosaically!

Since many years I often make mosaic collages as last minute presents -
you can find many free mosaic photo editors online.

The artist WorkByKnight (WBK)
makes stunning granny square mosaic pictures
is also recreating his pictures in yarn!
I can't show you a pic here because of the copyright
but have a look yourself! ;-)

I wanted to try it myself...

It's actually great because you can just
design your own patterns for blankets.

Haha, I could totally recreate myself in granny squares now!

I've used Mosaically.com for my test
& I thought I show you a short step-by-step tutorial...

1. You need LOTS of granny square pictures,
I've cutted out my granny squares with 
the free photo editor Picmonkey...
I just used the "square option" which is offered 
in the "Crop" section on the left side.
(On this screenshot you see part 2 of my 


2. Go to Mosaically.com!

3. Upload the photo you want to transform to a mosaic!
Click on "Step 2"!


4. Upload your granny square pics in "Step 2"!
(I've used 47 granny photos,
the more the better!)
Click on "Step 3"!


5. Play around with the
colour & the size
until you are satisfied!


6. Download it!
I've also added my signature
& increased the shadows in the pic for a better contrast...
Picmonkey.com is a real good free online editor! ;-)

Dada Neon Crochet Photo Mosaic Tutorial

7. Crochet your own mosaic blanket
or do whatever you want with this photo!

If you also make such a photo mosaic
or really crochet such a blanket
be free to show it to me on Dada Neon Crochet!

Dienstag, 10. März 2015

Yarn Bowl Tutorial! - By Malena Casey

What a wonderful idea!
My friend Malena (MariaElena)
 has made this gorgeous Yarn Bowl
& she was so lovely to write down a tutorial!
 It's such a good thing to have
- no yarn mess anymore
while we are crocheting!
(And also a good way to rescue
our yarn from playing dogs & cats!)
So here it comes:
MariaElena's first tutorial, yay! ;-)

♥♥♥ ♥♥♥ ♥♥♥


YOU WILL NEED:

A round Paper Mache Box
 

&
a pencil
a cardboard knife
sandpaper
white glue
all purpose sealer
water based Latex (mate)
some yarn & a hook
acrylic colors
Acrylic sealer/Finisher
 

First you draw with a pencil the shape of the cut you want 
and then cut it out with exacto or cardboard knife 
or anything else that will work for your box. 
Then you sand the opening edges with fine sandpaper 
until even and smooth and brush them with white glue. 
When it's dry run your finger through the edge 
to see if it needs more sanding. 
Apply a second coat of white glue and let it dry.
Now you apply a coat of all purpose sealer to the whole box, 
let dry and apply a second coat, 
sanding with a very fine sand paper in between.


Paint the box with water based Latex (mate), 
2 coats, sanding lightly in between. 
Now you can sponge a contrasting color, 
or paint whatever you would like, 
or maybe do some decoupage.... its your choice! 
I used a sea sponge and crafts acrylic paint 
and just dabbed some on the box. 
I painted a a border at the bottom and the edges on top, 
including the opening.


When you are satisfied with your decorations, 
apply 2 more coats of sealer. 
When the sealer was  totally dry, 
I rubbed the whole thing with a gel stain, 
very lightly and cleaning immediately, to give it an aged patina.  
I also made a crochet chain with matching cotton yarn 
and glued it to the upper border and opening. 
You can also use a glue gun.
Now you can spray your pretty bowl with an acrylic sealer/finisher 
and let dry overnight. 
Enjoy!! ❤️❤️❤️


♥♥♥ ♥♥♥ ♥♥♥ 

 Malena (MariaElena) & Dada are curious persons,
so if you have made your own Yarn Bowl
please post a picture
I will add your work to this blogpost as well!

 You have a fantastic idea,
written down a wonderful pattern
but you don't have a blog or webpage?
Don't be shy, we are all here to inspire us
& I will happily share your unique ideas here!

Dienstag, 17. Februar 2015

How to add a signature to your photos with picmonkey!

It has become a must to add a signature to photos - 
It happens quite often that criminal crochet pages take photos of beautiful works & claim it's their work... :-(

I have found a wonderful page to improve photos & to add a signature:
A few little steps are helping you to add your name or page to a pic...

My friend Malena Casey
(for me still MariaElena or my highness!)
has crocheted such a gorgeous puzzle piece
& we don't want bad people to steal this pic
with her Nana Dada!
With her friendly permission
I will demonstrate how to add
her name on a photo!
Criminal minds can still steal the photo
but they can't claim that easy
it's THEIR work anymore!


1. Open the page www.picmonkey.com
& click on "Edit" - upload the photo


 2. Click on "Tt" (left column)


 3. Choose your favourite font & press the "Add Text" button!


4. Add your name, change the colour & size of your text!


5. Find the best position for your text!
(Just for fun I've added a rose,
this page offers so many opportunities!)
Press the save button!


6. If you wanna post a pic in facebook:
press the "Change" link!


 7. The bigger side of the photo
should have 1024 px!
Just type it in the box,
the friendly picmonkey is automatically adjusting the photo!
(Keep this magical number in your head!
Facebook is reducing the quality of pics
but with 1024 px & a file size smaller than 1 mb
your photo will keep it's quality!)


8. Save it - done! ;-)


Just a little tipp:
For Facebook posts it's
best to use the picmonkey crop option
with the size "square"!
Many people use smartphones
& can only see a part of the photo if it's not a square!

Montag, 13. Oktober 2014

YOUR Personal Freeform CAL! - Week 19

You need a personal freeform blanket, too?
Whenever you start it,
I will always post your pictures
on my page Dada Neon Crochet & add it to our CAL photo album!
No time pressure at all!
If you wanna join this freeform adventure you can find the first project here!

♥♥♥

 I hope all of you had a great week!
Mine was pretty good!
Lots of new stitches,
one more guest from Scotland!
(Sarah's boyfriend Adam has joined us!) :-)

My brother surprised me with a visit,
this has made me so happy!
It's great to have such lovely support
& we have spent a real good time together! :-)

I just had to create another 20's hat,
I really fell in love with this pattern!
I'm thinking about crocheting me 4 more -
in my beloved neon colours of course!


You can find the free pattern here on Hopeful Honey's page! ;-)
And I could finally present my huge version of
Lookatwhatimade's fantastic Sophie's Garden Pattern!
For all who wanna have such a blanket, too:
Of course you can also make a normal sized version,
please try it, it's so much fun!


I don't spend much time on Facebook at the moment,
I hope I don't miss too many notifications of you.
I'm still present on the page
but I need much time for paperwork
& the rest of my time is dedicated to crocheting -
the best therapy anyway! ;-)

♥♥♥

My weekly "Thank you!"
to my lovely CAL Club members!
We have official 33 CAL friends now!
(A hello to our inofficial members as well!)

Lovely greetings to Roberta,
 our multicreative CAL friend!
Many thanks to Jodie,
the project for this week was based on your idea
& it was a real pleasure to create it! ;-)
 Greetings to our CAL friend Ulrike!
Aww, Gwenda! Your childhood puzzle piece is such
a beautiful work again!
I can't wait to see your completed CAL in the end!
 Thank you to Sandy (Sandy's Sundries & also her beautiful Etsy-Shop) -
I've just seen I've missed your birthday,
a belated Happy-Birthday-Hug!
Alicia of Marcalic's Creations -
hope you have had a great week!
I've bought me a spinning wheel now!
Sooo excited, hope it will arrive in the next days...
Thank you to Marina & her wonderful Freeform Crochet World Group
& her Freeform Crochet World!
 She is also offering us fab tutorial on Snovej.com
(Snovej Crafts on Facebook!)
Lovely greetings to our CAL friend Anouk of Een steekje verder!
 A lovely "Thank you!" to my friend MariaElena -
it's so much fun to have our little chats!
Hugs to my funny princess!
 Much love to my friend Lin with her beautiful page Crochet in Colour
(here is also the link to her Etsy-Shop!)!
Such a pleasure to see you bright & colourful makings,
it's so wonderful to see so many wonderful creations grow!
 Greetings to Shawn of Dragonbird Creations,
 you have grown amazing things again!
I love to visit your page,
there are always such unique stitches to find!
And so much fun!
Lovely greetings to Lisbeth in Denmark!
Your beach-yarnpainting is sooo beautiful!
I guess many of us have the sea
as the favourite place to stay, too!
Lovely greetings to Jane & Scotland, her wonderful country!
Tracy of Eden Reborn - also to find on All Our Own Crafts Gallery now -
You have made so many fingerless gloves, amazing!
I've just crocheted me some too a last week! ;-)
Lovely greetings to Jenny (Craft Cove & also represented on her blog) -
I hope I can finally complete your beautiful pattern this week!
 Greetings to Donna & her art page Walker's Whimsies
(She is also an admin of Marina's Freeform Crochet World Group now!),
you have an amazing taste in all kinds of art!
I'm always happy to find gorgeous artists on your page!
 Lovely greets to Anne,
love to see your unique makings!
Greetings to my friend Zelna of Zooty Owl -
this time I will make it in your next Happy Days CAL blogpost!
Time was working against me
but I've already started my Mandala Squares! ;-)


Congrats to our CAL friend Monique of Yemanja -
 I hope you have a wonderful celebration time,
Yemanja exists 5 years now, yippie!
Hugs to Saskia ("MalleSas" in her artist life)!
I love your creative makings,
your freeformed hood is so cool!
Thank you so much for your lovely support!
 Of course also greetings to Cilly & her beautiful dog!
I love it when animals are modeling for
your CAL pictures! ;-)
A heartly greet to Michi (fab page "Knittenfee"!!!) -
I'm still stuck in the progress for my portrait,
will take some more time,
too many projects, you know what I mean! ;-)
Greetings to our CAL friend Brenda!
A huge "Hallo!" to Enna (Mishook aka Strikkeliese & in the blogworld Mishook) -
I hope everything i fine around you,
last night I've shared your first puzzle pieces again,
such a wonderful photo!
 Lovely greetings to Nancy of Needleful Things!
I've seen your first experiment with tapestry crochet,
just beautiful!
 Greetings to our CAL friend Judy as well-
I hope you are fine!
Of course also a greeting to our talented CAL friend Nora!
Jacqui of Hooky Delights. -
I love the psychedelic wallpainting you are creating for your son!
He can be so happy to have such a creative mother!
Greetings to Denise of Wickedcrochet (her to find on Etsy!)
Thank you again for your beautiful inspiration
for last week's project!
Alex is just sitting next to me!
I would love to show you some new puzzle pieces of him
but he is working on an amazing yarnpainting...
So wow, I hope I can show you some progress pics soon!
Lovely greetings to Lisa of Knotty Girl Yarn Art!
I think you have already a lo of fun with his project!

And....Yippieh!!!
I can present a new CAL friend!
Lindy has decided to take part in our freeform adventure!
I wish you a wonderful experience on our freeform playground!
Here are her first gorgeous works,
I love to see that all of you have such an unique style!
Fabulous yarn choice, Lindy!


Let's have a look at some new progress pictures, yay!


 And here you can see Gwenda's gorgeous
childhood puzzle piece!


♥♥♥

So, but what is the project for this week?
Jodie gave me a wonderful inspiration!
Some of you might remember
that I wanted you to start the puzzle piece for week 1
with yarn in your favourite colour...
It was only a small part in the middle of the project.
This week we will play around a lot with our favourite colour!
Jodie suggested we could try a lot of different stitches
to receive a real special puzzle piece!


It was so much fun!
I wanted to try new stitches as well
but first I've started with some favourite stitches...
The Popcorn Stitch, my beloved Bullion Stitch,
the Basketweave Stitch (I love to play with it!!!)...
It was already so big
& I was in the mood to freeform stitches
with 3D-effects so I didn't try a new one
but improvised...
So much fun to create stitches by yourself!


I can only tell that it was such a great
& also really a new experiment for me!
Because I love using different colours...
I love creating new stitches
(I always try to reconstruct stitches
by looking at a photo -
actually I don't know if it's actually
made in another way.
Doesn't matter if it looks that way!)
For those of you who like crochet videos
to learn new stitches I have to recommend
a wonderful page:

I don't use the videos but the collection of stitches
in the "Crochet Stitchionary" is awesome!
I love to scroll down in this selection
because it's so inspiring & all the beautiful stitches
are on one place to get discovered!
Even if you prefer photo tutorials
have a look at the stitches on this page.
If you fell in love with a stitch
you can just use your favourite search engine
to find a stitch description...


Haha, I guess you already know that my favourite "colour" is neon!
I just had to use all neon shades!
If you have more than one colour you really adore
or maybe a colour combination go for it.
But try to stay with one colour for a while! ;-)
If some of you have more than one favourite colour
you could also start with Marina's 2-4 color spiral tutorial!
I came to this idea when I was already in progress
but maybe someone of you want to start with such a spiral! ;-)

That's how mine looks in the end...
Somehow like a frog!


I can't wait to see YOUR favourite colour projects!
Hugs to Jodie, such a good idea! :-)

I wanted to ask you to take a pic
of your puzzle piece collection...
It doesn't matter if they are already attached or not!
As you all know I would love to have a book dedicated
to our YOUR Personal Freeform CAL.
I have to send awesome pics
when I'm writing to editors,
would be great if you could do me this favour!
If you want to you can be on the pic, too!
I love to see CAL pics with you! ;-)

♥♥♥

I love to prepare YOUR ideas so let me know 
what else you want to have in your CALs!

Stay awesome you talented princesses & princes,
it's a pleasure to have such gorgeous playfellows! 
Hugs from your friend Dada (or Julia)!

♥♥♥

Let me see your art in Marina's Freeform Crochet World Group, on Dada Neon Crochet or Ravelry